 Here is an post that explains how I made a Cat Food Dispensers for 2 cats based on raspberry and Arduino… Controllable by the intenet, and programmable as yo want… I will not go into all the details of the design because the goal is mainly to give you ideas if you want build a dispensers. I am get inspired dozens of examples found on the internet. I have hesitate during a long period to use a worm solution but I did not had the screw and someting to make it (like here) I opted for another solution. I am using Domoticz in terms of planning control because I already use with domoticz RFXCOM for other uses (see my previous articles).
Bellow most of the sources I used :
instructables.com, blogouillage.net, project238.blogspot.fr, robovergne.com and also : lafamillecreative.blogspot.fr. You will ffind a large number of exemple in google using kee worlds : “arduino cat feeder” or “arduino fish feeder” …
My goal was to feed 2 tiny cats when I am leavig for 1 to 3 days (max) as they don
Bref, je voulais donc nourrir mes 2 chats lorsque je part quelques jours (2 ou 3 maxi) , they don’t know to regulate themself 🙂 And as they do not eat at the same speed, one day after I leave , the most gluttonous of two already finished everything!
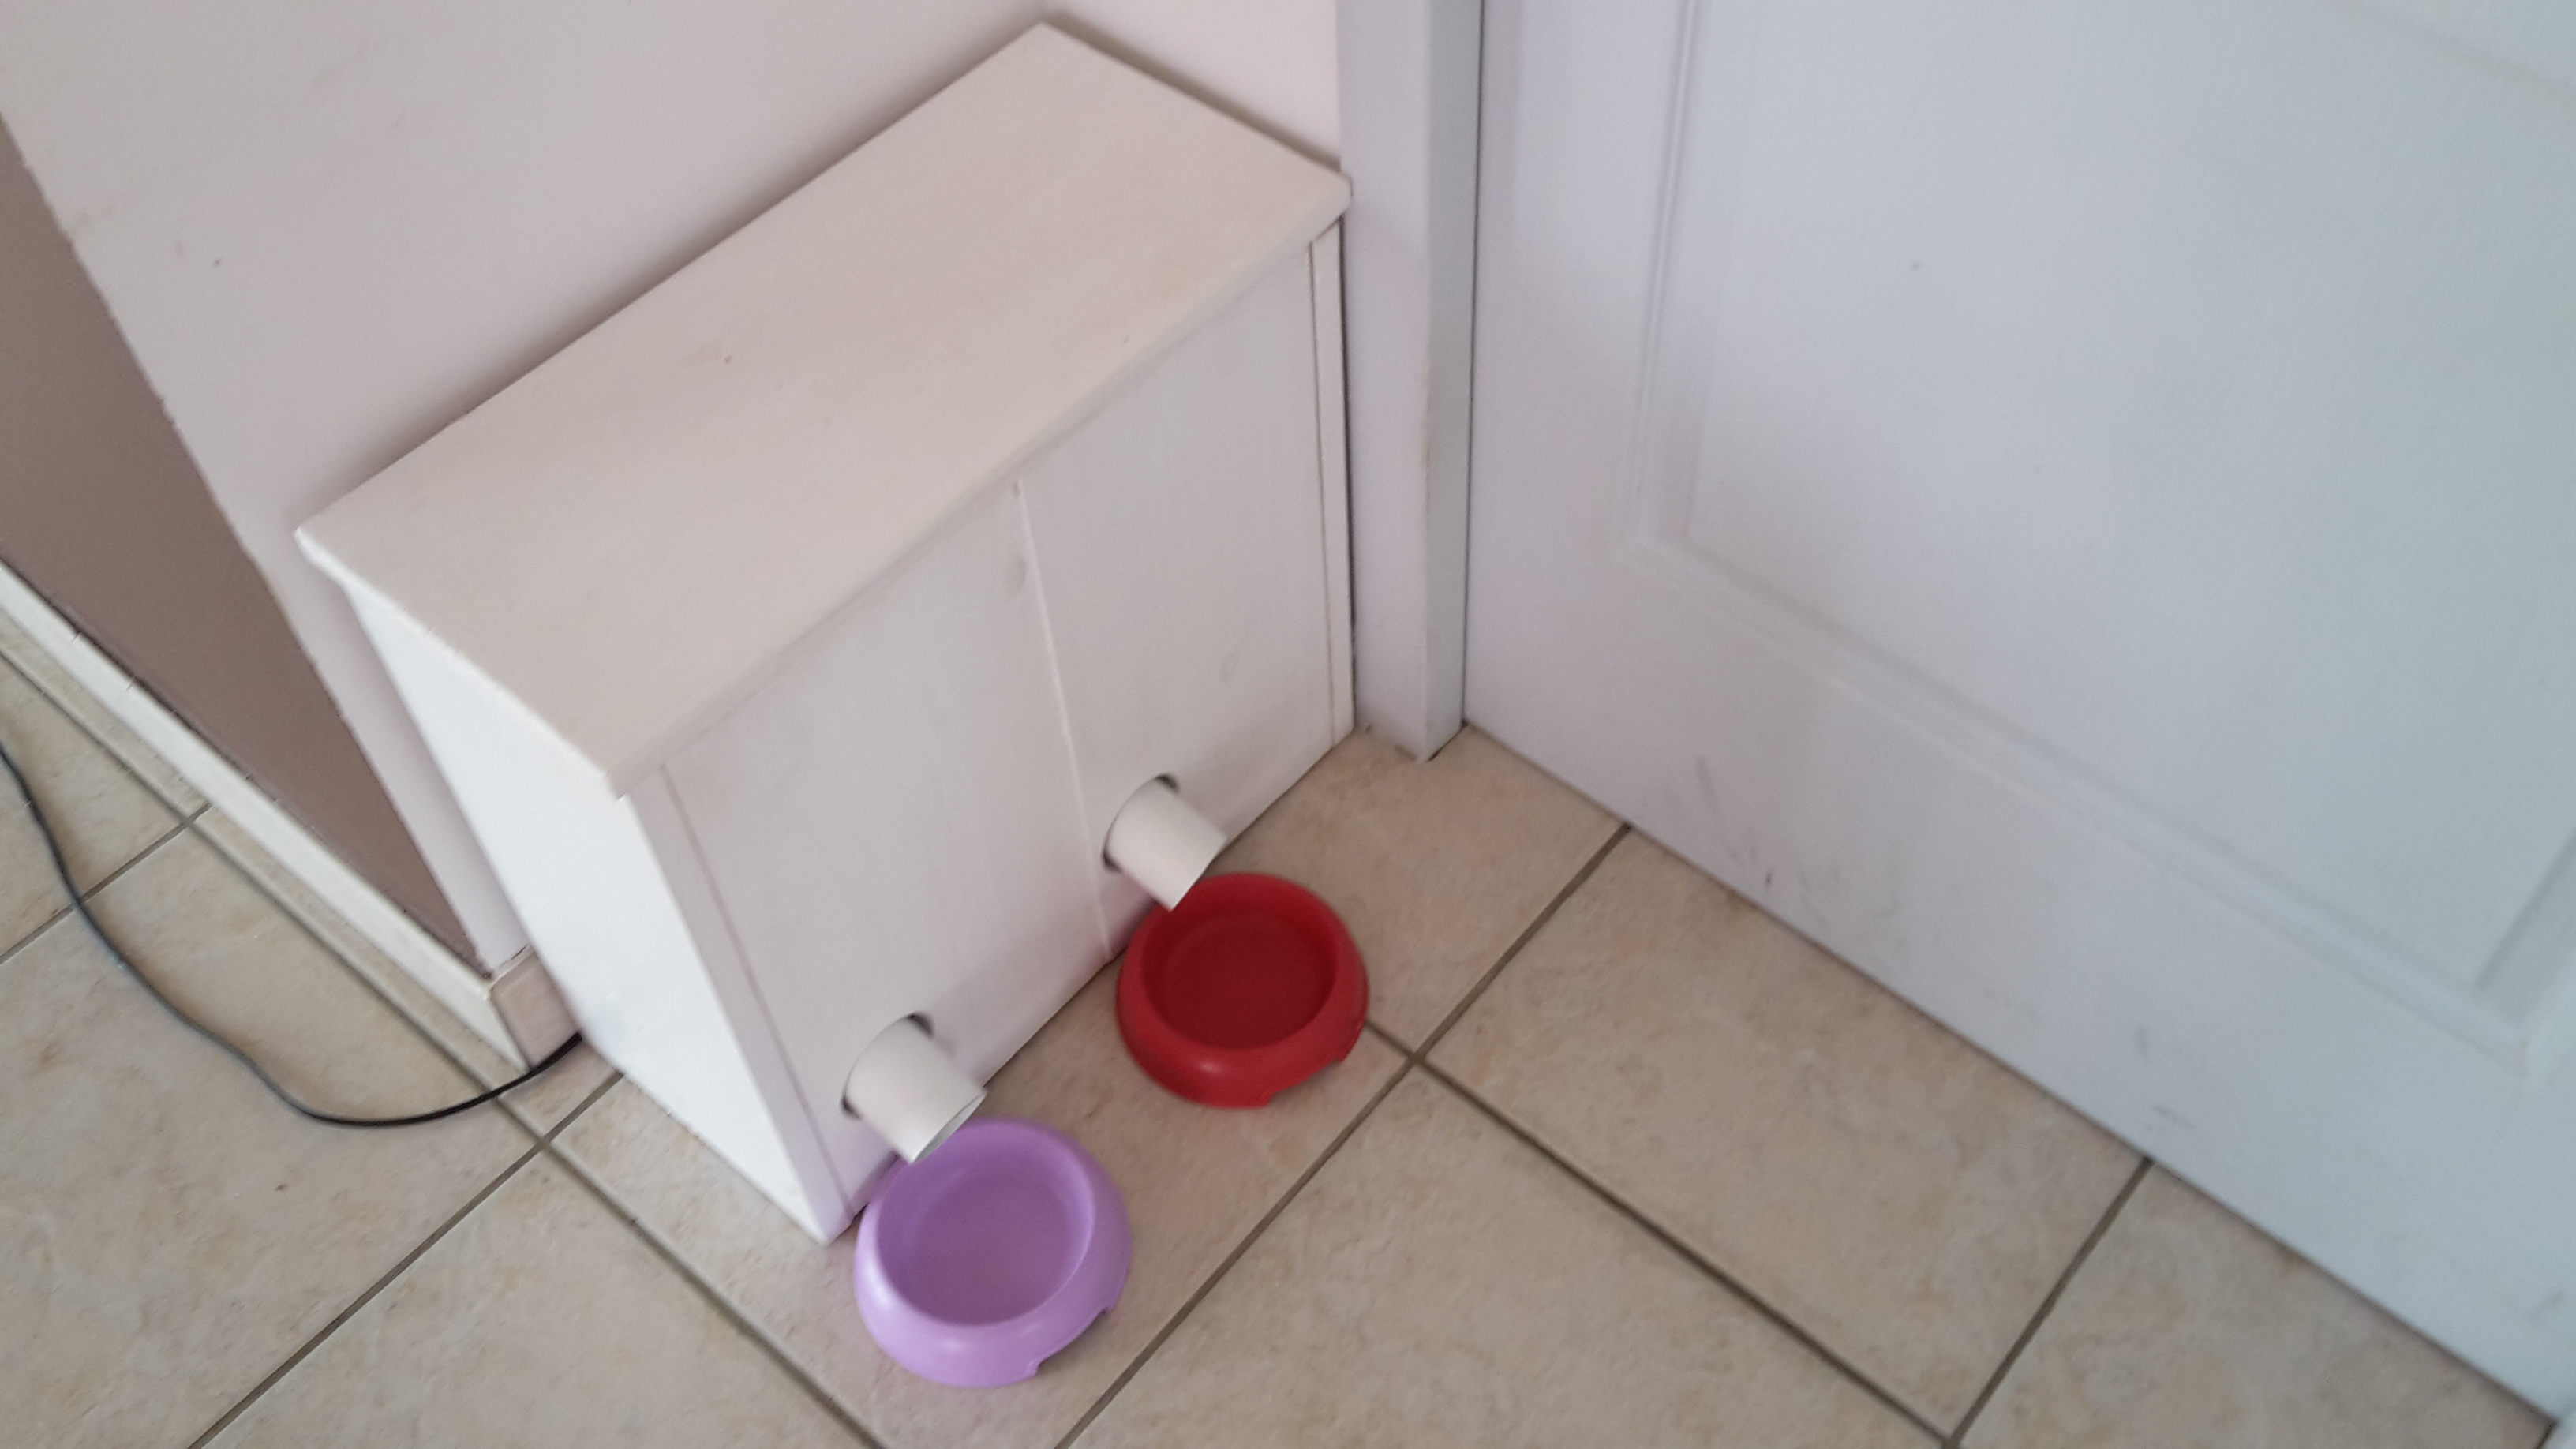
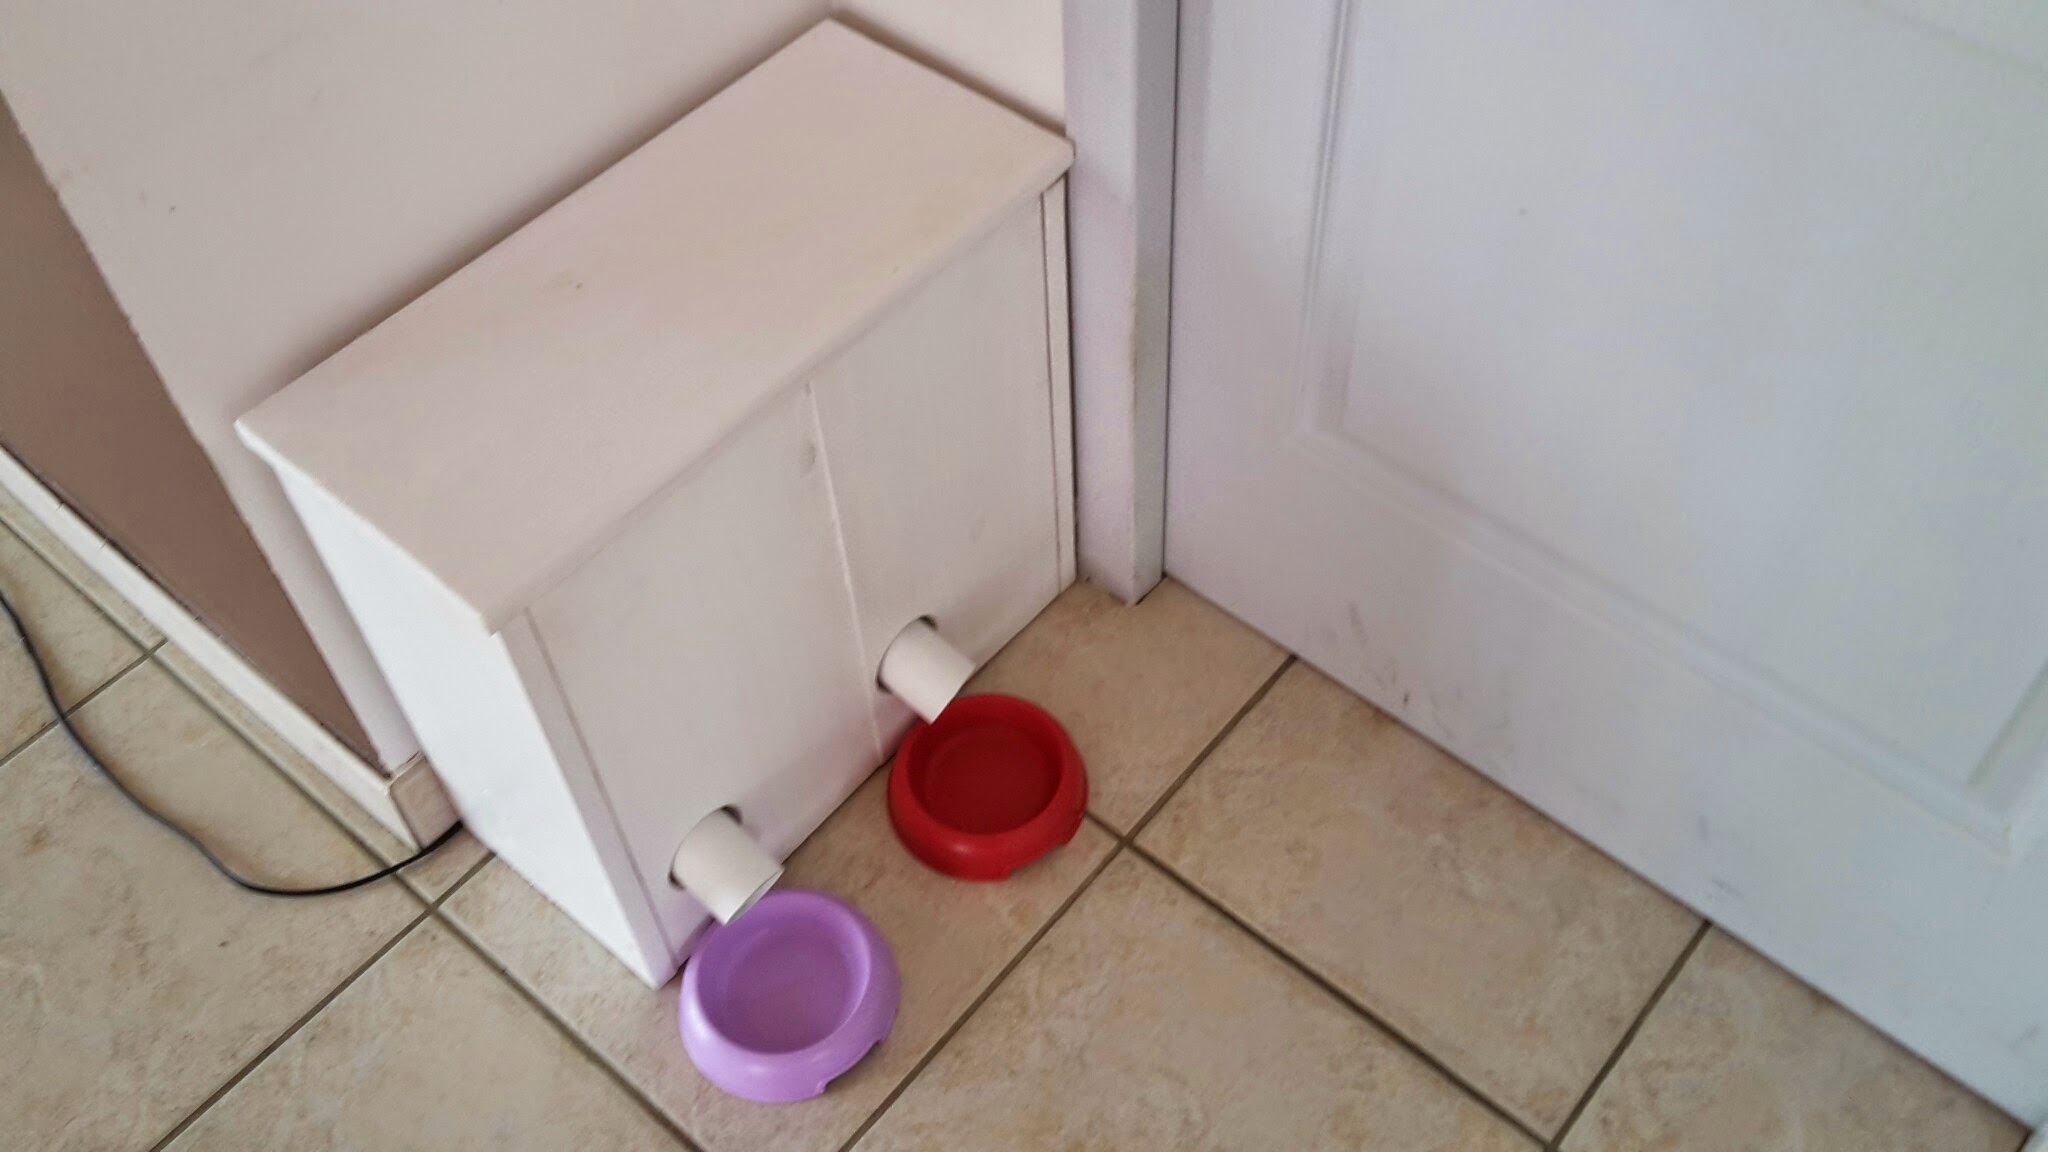
Here the picture of the Cat Box finished :
Outside :
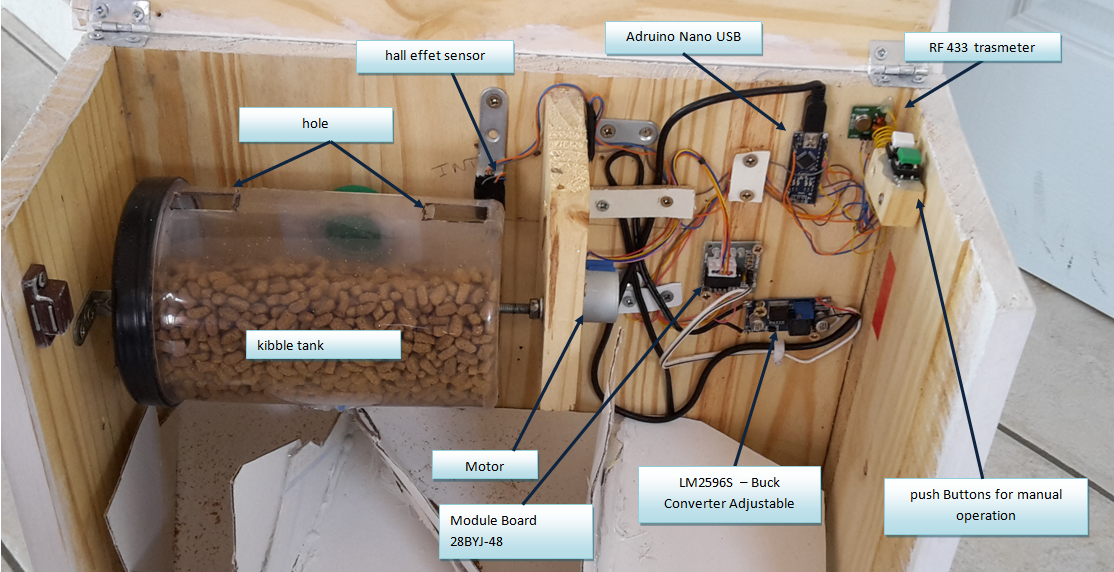
Inside :
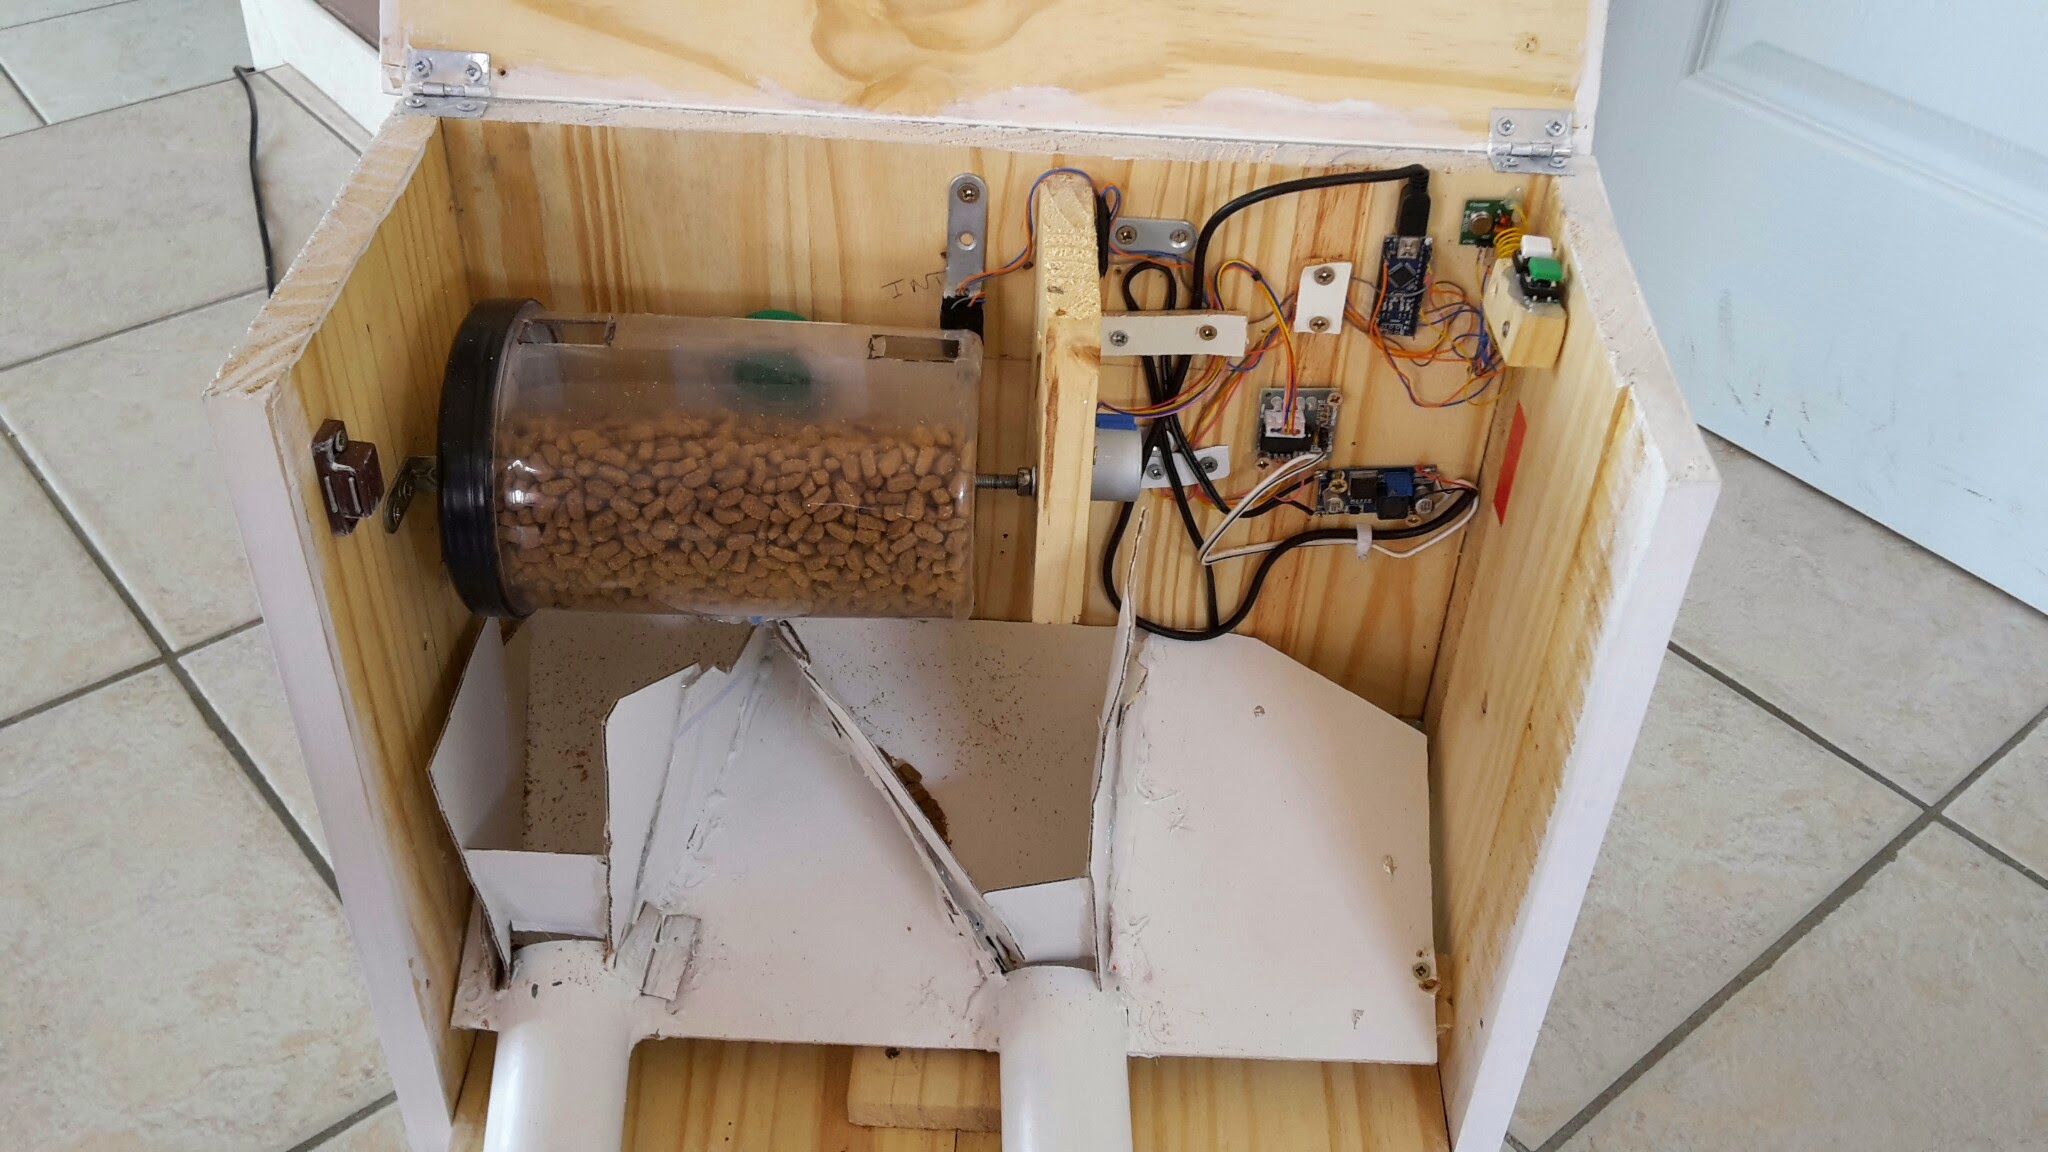
Step 1 List of Component
- Respberry b+ *
- Rfxcom *
- Ardiuno Nano USB – 2.5€
- 433Mhz RF transmitter and receiver – 1€
- 5V Stepper Motor [ULN2003] + Module Board 28BYJ-48 2.5€
- alim 12v recovery (mini 1 A)
- LM2596S – Buck Converter Adjustable (not necessary if tyou have a powerfull 5v alim) – 2€
- Hall effect switcht hall A3144, + some resistors ~5€
- some boards
- PVC pipe 4€
- RF switches (not mandatory)
* if you already have these component, there is no need to bye additionnal.
Total budget for me : 20 to 25€
Step 2 setup of the components .
Step 3 Building the “CatBox”
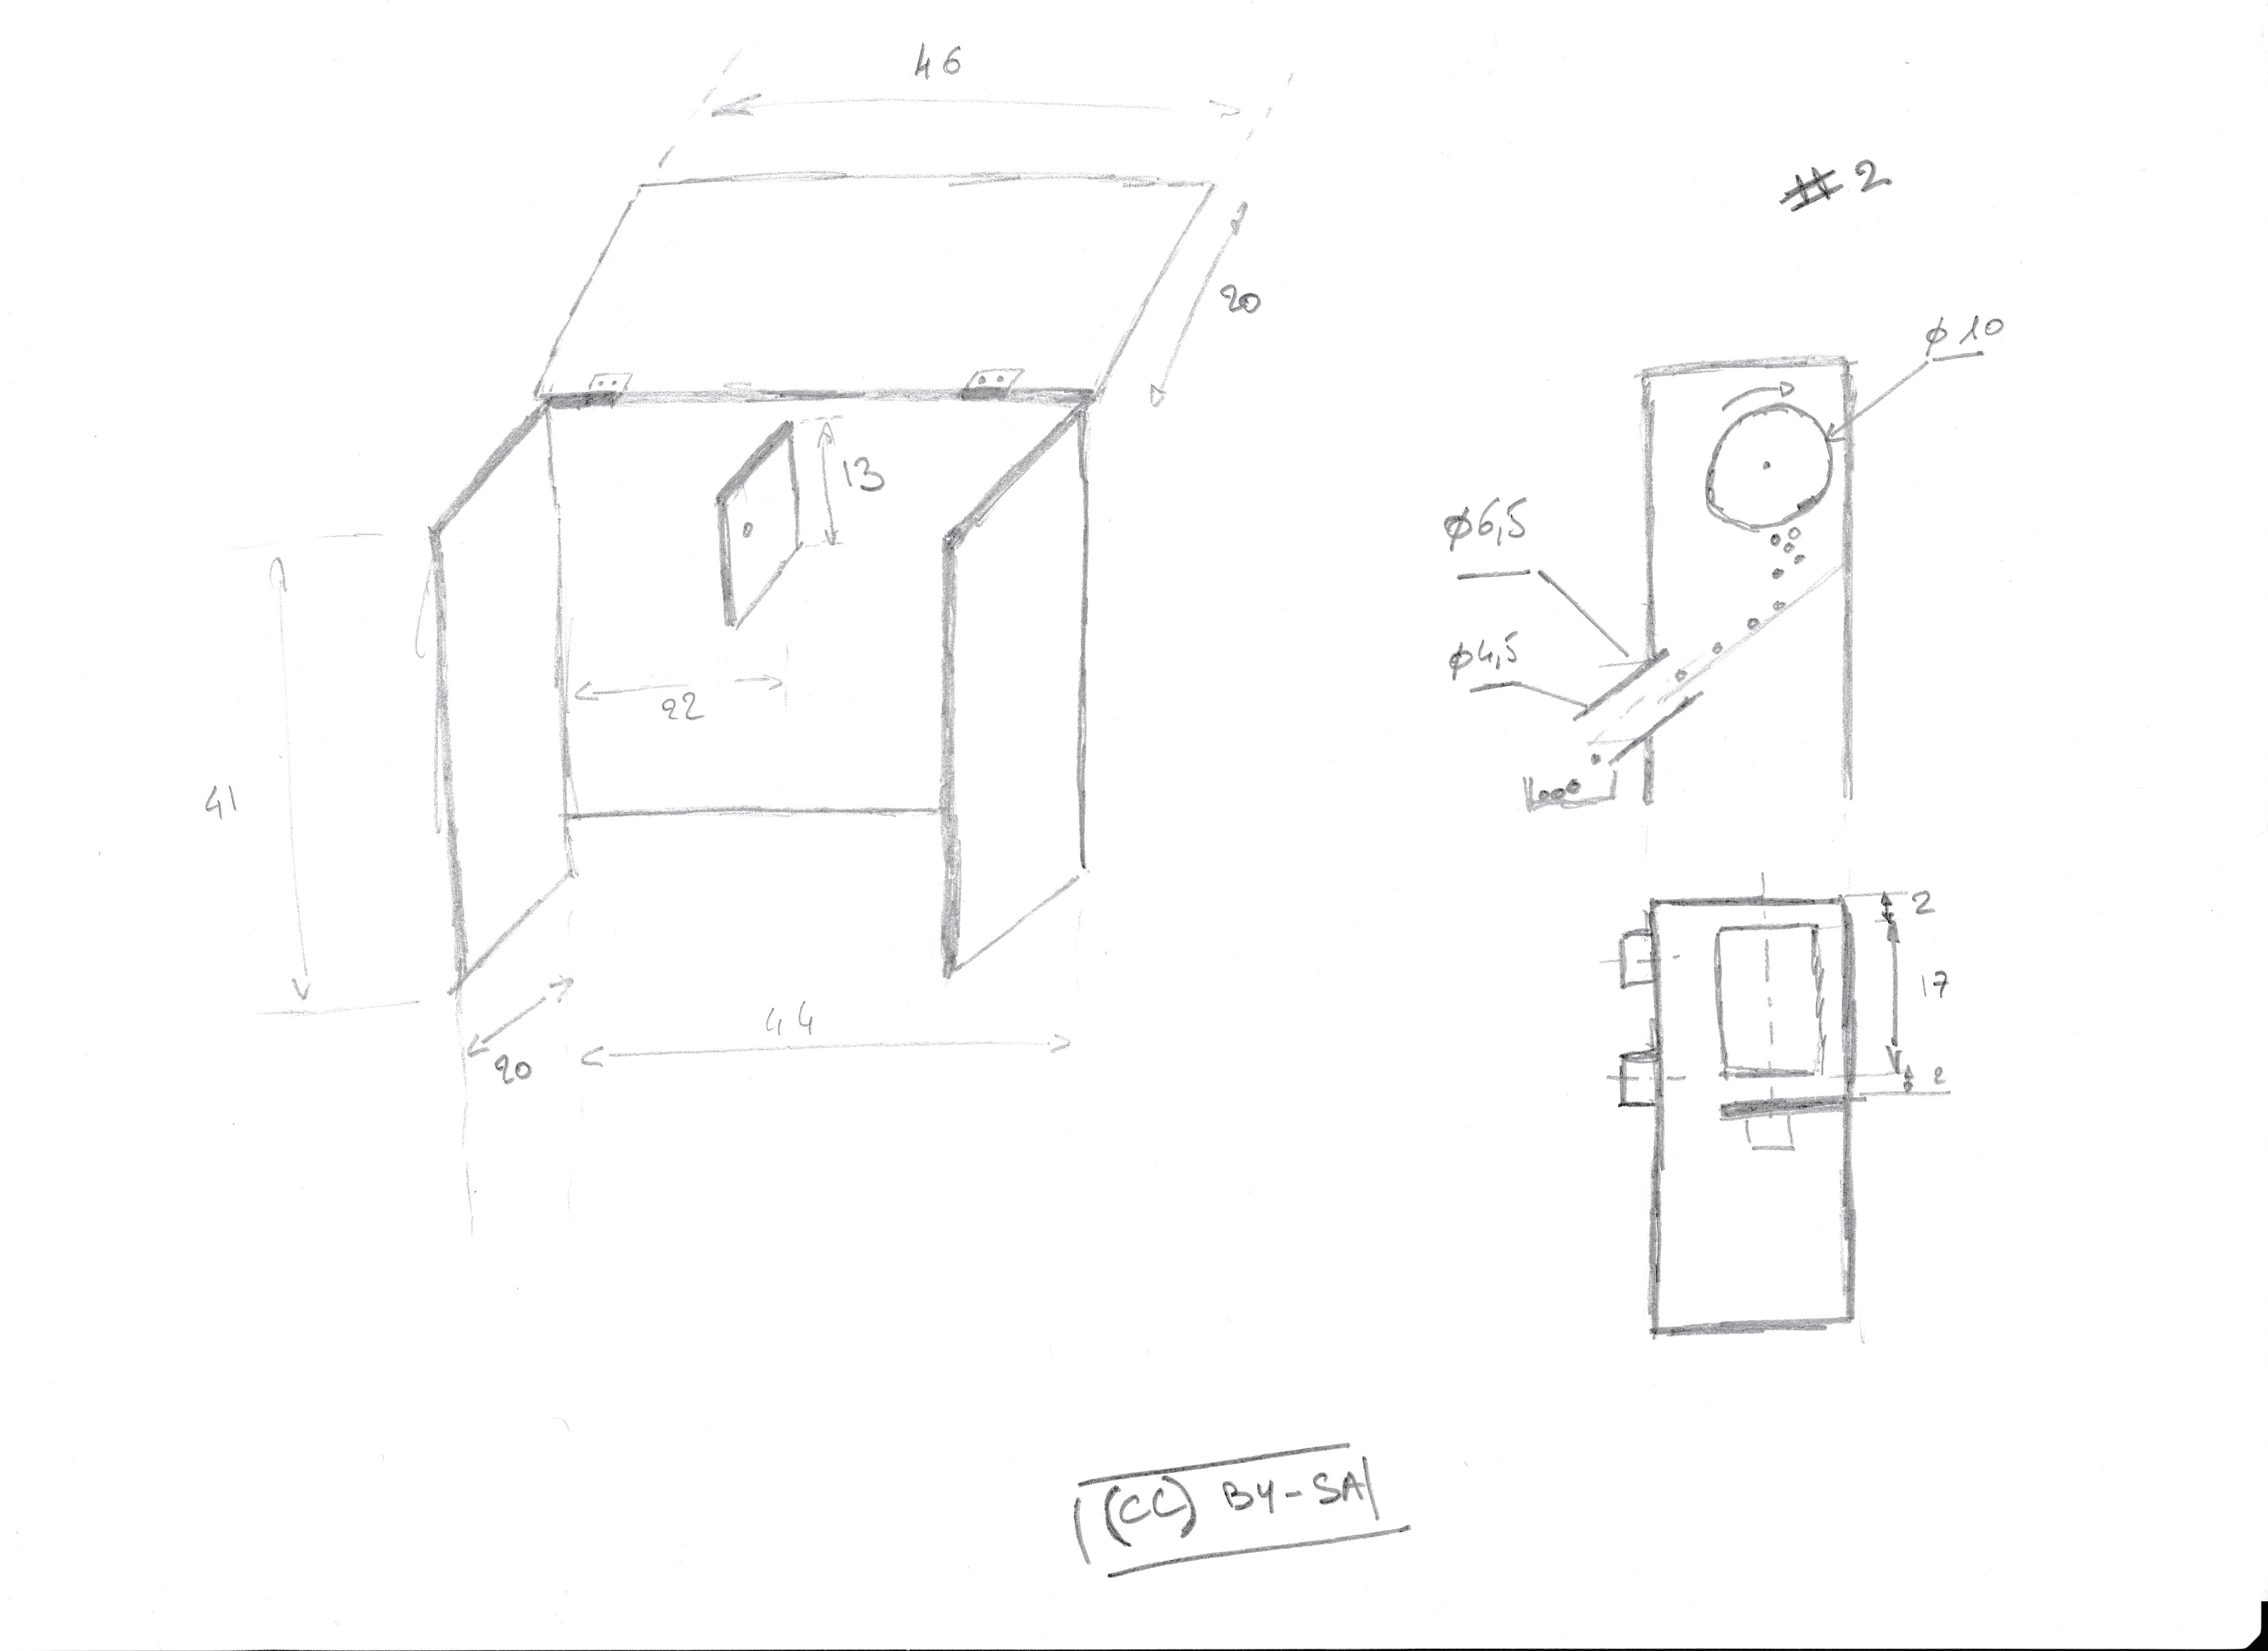
You will find bellow the simplified shemas to being able to build the cat box. I used pine boards 20 cm width. You can found easily and cheaply from DIY chops. About 6 € for 2.50m x 20cm board thickener 4mm.
Step 4 : Principe de fonctionnement
I made the choice to control all via a remote RF switch. You can replace this switch and create yours for 6€ by following this idleman’s tutorial here.
The remote swtch is controled by domoticz domoticz via the RFXCOM interface (or via the remote control of the swith). Once the Arduino card is turned-on, after some seconds, the automatic mode starts and a complete turn will release a dose of kibble. The engine stops when the Hall effect sensor detects the magnet on the cylinder. Once complete tour made, a signal is sent to RFXCOM and domoticz to inform the tour is finished. This signal validates that the engine is not blocked and that it ended well finished his round each time. I use to send information to the Arduino RFXCOM x10rf the library (see source here).
The manual mode allows to interrupt the automatic mode at any time and to rotate in one direction or the other the cylinder to allow for example to position the cylinder for refilling.
Step 5: Code
I use several libraries, the first is “Stepper” the bookseller who used to control the stepper motor. No need to downloaded it already in the library provided with the Arduino environment.
The second is x10rf that can sent RFXCOM knowed info that includes (RFXMeter, RFXsensor …) You will find all information about the library here: Link 1 sources, Link 2.
Download the zip file: cats_box
Once the downloaded, directory “x10rf” must be moved to your library directory.
Your opinion ? Leave a comment it will always be fun 🙂